
Refari Built Websites
How to Add New Users to your Refari Website
https://help.refari.work/knowledge-base/article/how-to-add-new-users-to-your-refari-website
Adding new users to your Refari WordPress site is a straightforward process, crucial for expanding your team and delegating website management tasks. Whether you're looking to bring in a new editor, author, or administrator, WordPress simplifies this process, allowing you to manage roles effectively within your site's ecosystem. Here's how to ensure a smooth addition of new users to your WordPress dashboard.
Note: Before proceeding, ensure you have Administrator access to your WordPress dashboard. This is essential as only Administrators have the permission to add new users.
Step 1: Access Your WordPress Dashboard
To start, navigate to your WordPress login page, which is typically found by adding `/wp-admin` to your site's URL (e.g., `http://www.yoursite.com/wp-admin`). Enter your login credentials to access the dashboard.
Step 2: Navigate to the Users Section
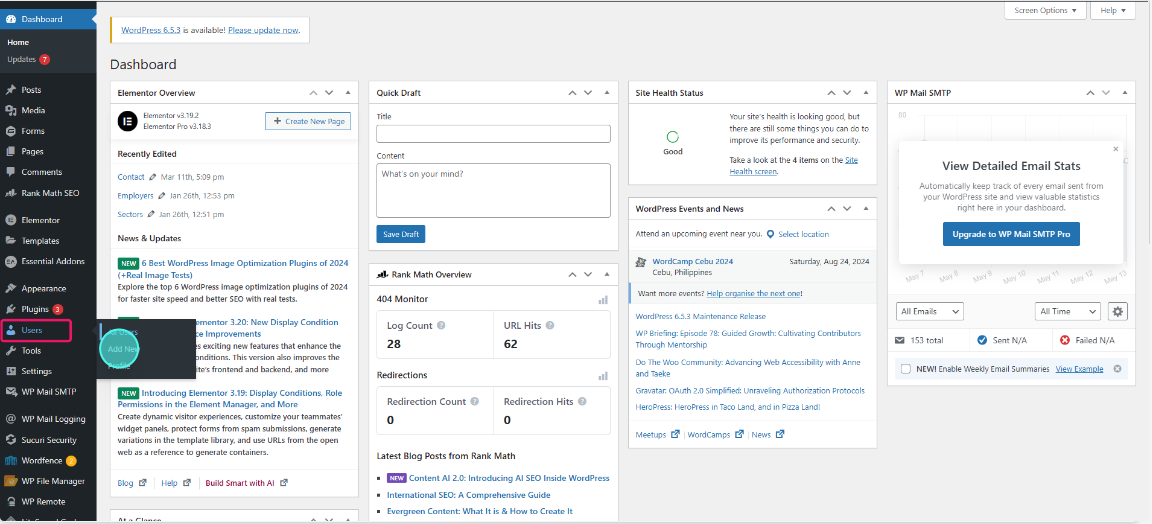
Once logged in, look for the `Users` option in the left sidebar. Clicking on `Users` will reveal a dropdown menu. Select `Add New` to begin the process of adding a new user.
Step 3: Fill Out the New User Details
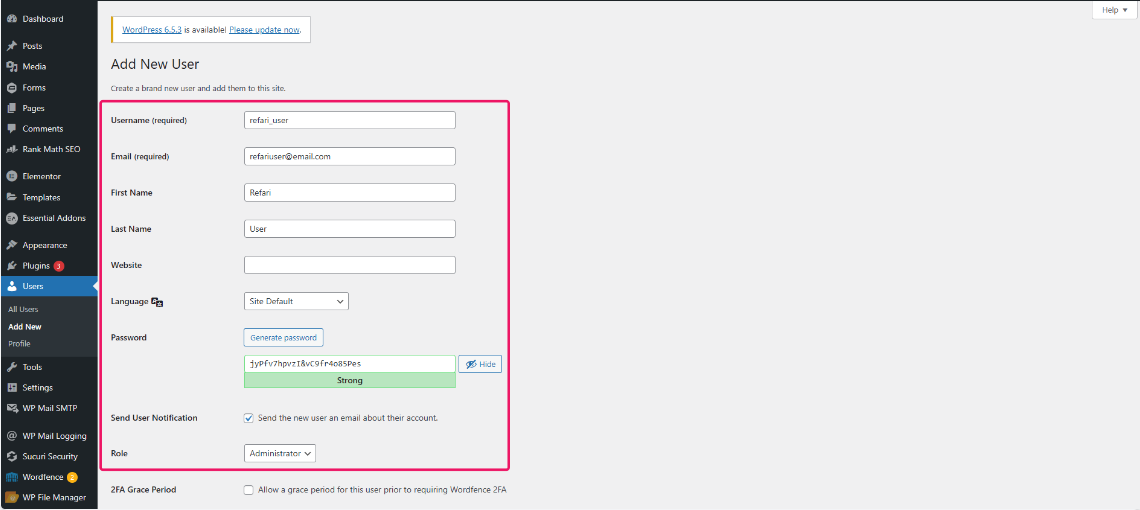
You'll now be presented with the `Add New User` page. Here, you'll enter the details for the new user. It's important to fill out this information accurately:
Username (required): Choose a unique username for the new user. This will be their identity on your WordPress site.
Email (required): Enter a valid email address for the user. WordPress uses this for account notifications and password recovery.
First Name, Last Name, Website: These fields are optional but can help personalize the user profile.
Password: WordPress will generate a secure password automatically, but you have the option to create a custom password. Ensure it's strong to maintain account security.
Send User Notification: Select this option if you wish WordPress to send an email to the new user with their account details.
Role: Assign a role to the new user. Each role comes with its own set of permissions, so choose the one that best fits the user's needs on your site.
Step 4: Finalize and Add the New User
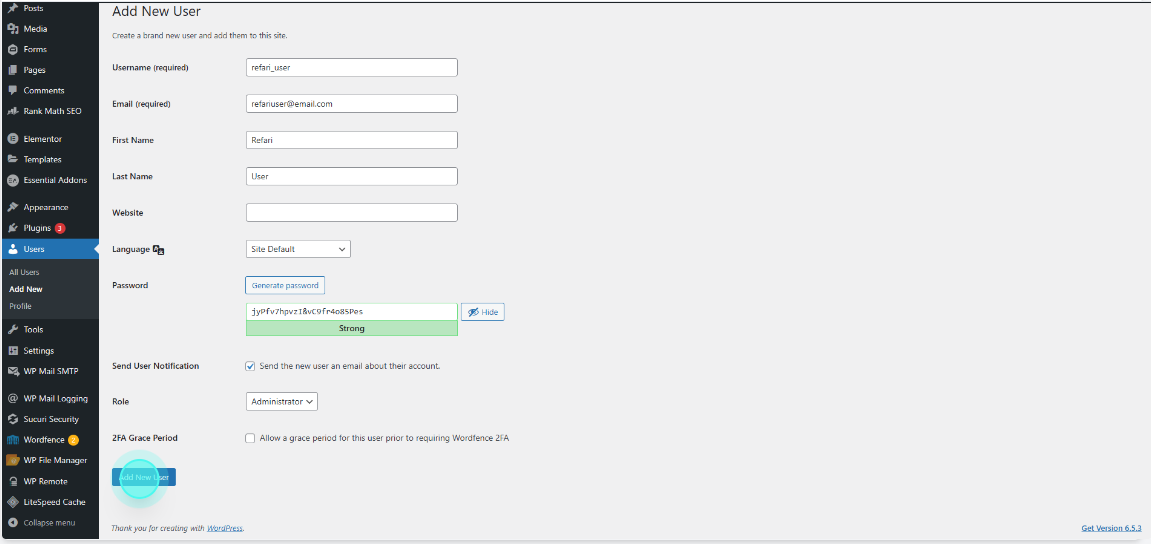
After completing the form, click the `Add New User` button at the bottom. This action creates the new user account and, if selected, sends an email notification to the new user with their login information.
Additional Tips:
Consider the user role carefully. Assigning someone as an Administrator gives them full access to your site, which may not always be necessary.
Regularly review your user list to ensure only current team members have access.