
Refari
Adding Company Testimonials in Refari
https://help.refari.work/knowledge-base/article/adding-company-testimonials-in-refari
This guide walks you through adding a company testimonial in Refari. Company testimonials sit alongside your recruiter testimonials in any Refari testimonial widget, so you can showcase praise for the company as a whole, not just for individual recruiters.
Company testimonials vs recruiter testimonials
Refari supports two flavours of testimonial, and both appear in the same testimonial widget:
- Recruiter testimonials are about a specific recruiter or team member. Clicking one in the widget takes the visitor to that recruiter's profile, where they can see the jobs and candidates that recruiter is working on.
- Company testimonials are about the company as a whole. Clicking one takes the visitor to your job board instead of a specific recruiter profile, which makes them a great fit for testimonials from clients (for external recruitment teams) or hiring managers (for in-house teams) about your overall service.
The steps below add a company testimonial. Recruiter testimonials are managed from each user's profile and are covered in a separate guide (linked at the bottom of this article).
Step 1: Open Company Branding and scroll to Company Testimonials
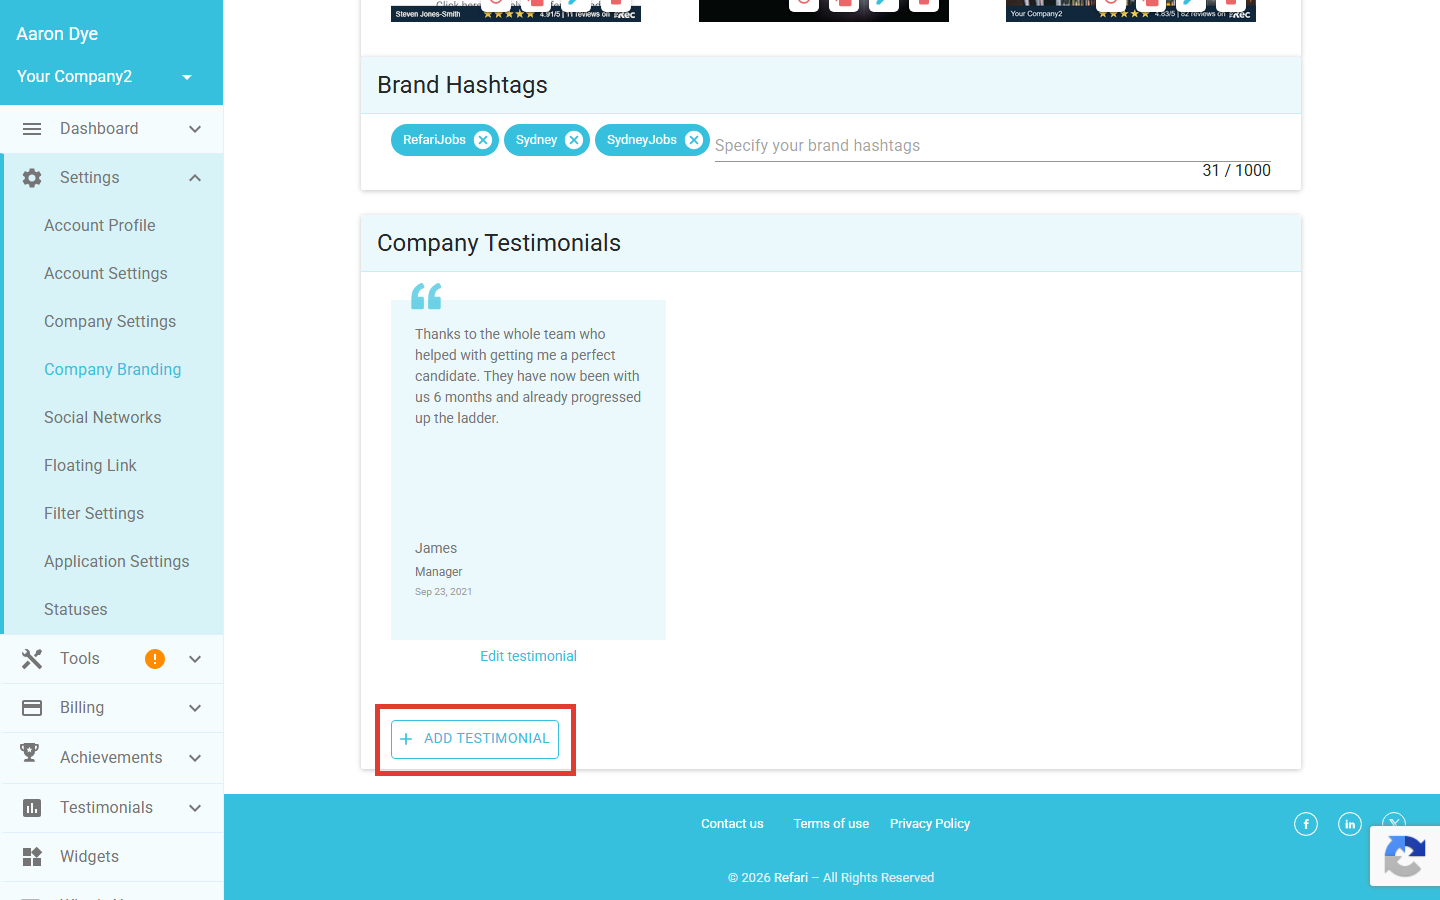
In your Refari dashboard, go to Settings > Company Branding (or open https://app.refari.co/settings/company-branding/ directly). Scroll all the way to the bottom of the page. The Company Testimonials section sits there, showing any existing company testimonials and a + ADD TESTIMONIAL button.
Step 2: Open the Add Testimonial form
Click + ADD TESTIMONIAL. The Add Testimonial modal opens with fields for the testimonial text, author name and occupation, the date, and a few options.
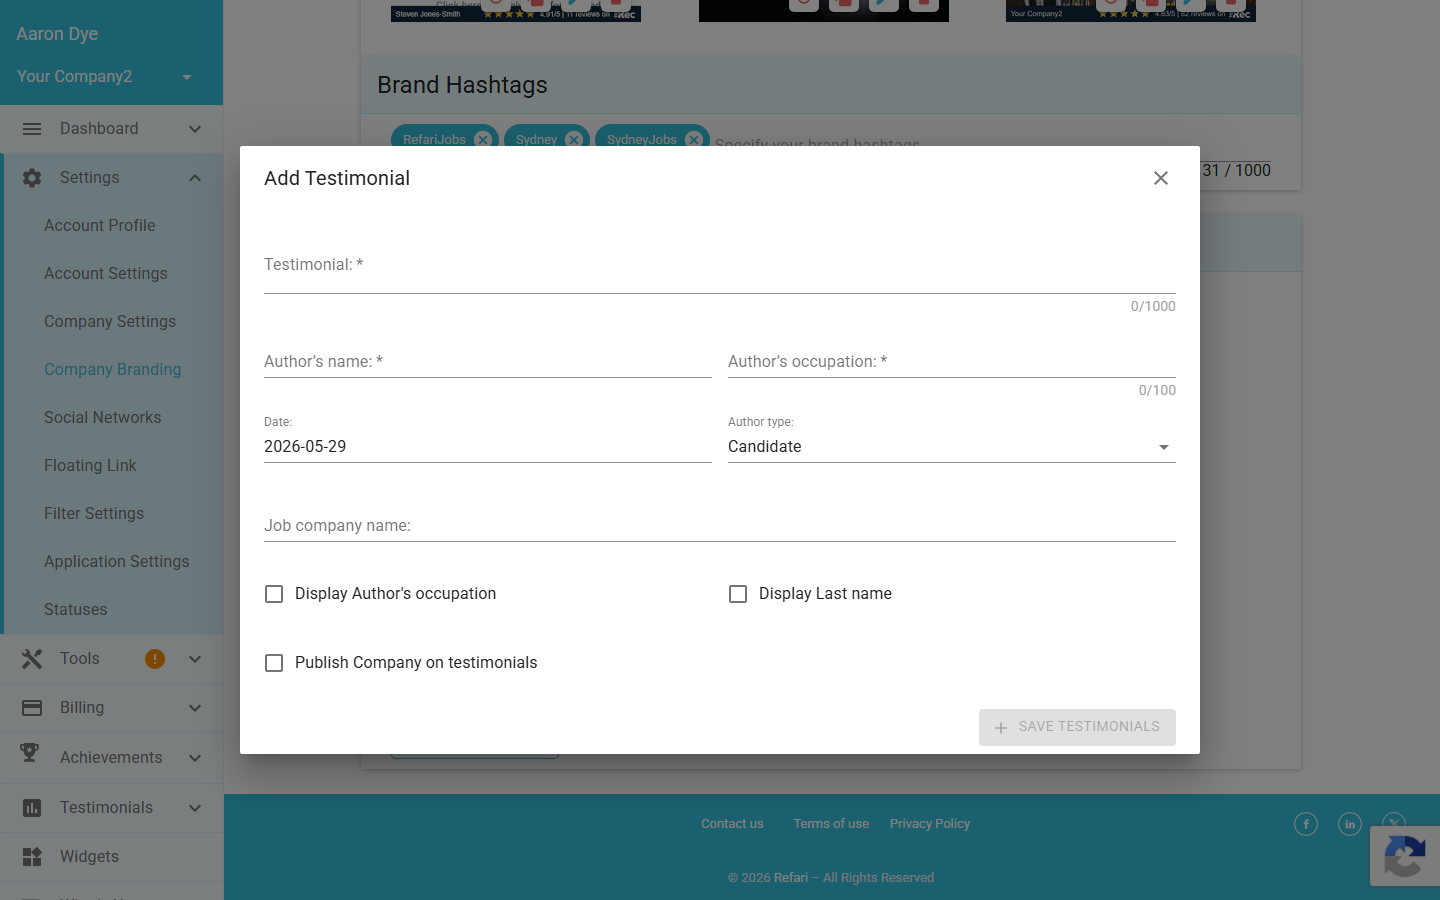
Fill the form out as if you were entering any other testimonial:
- Testimonial: the quote itself (up to 1,000 characters).
- Author's name and Author's occupation: who said it, and their role.
- Date: when the testimonial was given. Defaults to today.
- Author type: pick Candidate or Client, depending on who gave the testimonial. Client is the natural choice for most company testimonials, including hiring-manager testimonials for in-house recruitment teams.
- Job company name: optional, useful when the author is a client or hiring manager and you want to credit their company.
- Display Author's occupation and Display Last name: tick these if you want either to appear publicly in the widget.
Step 3: Choose whether to show the job company name
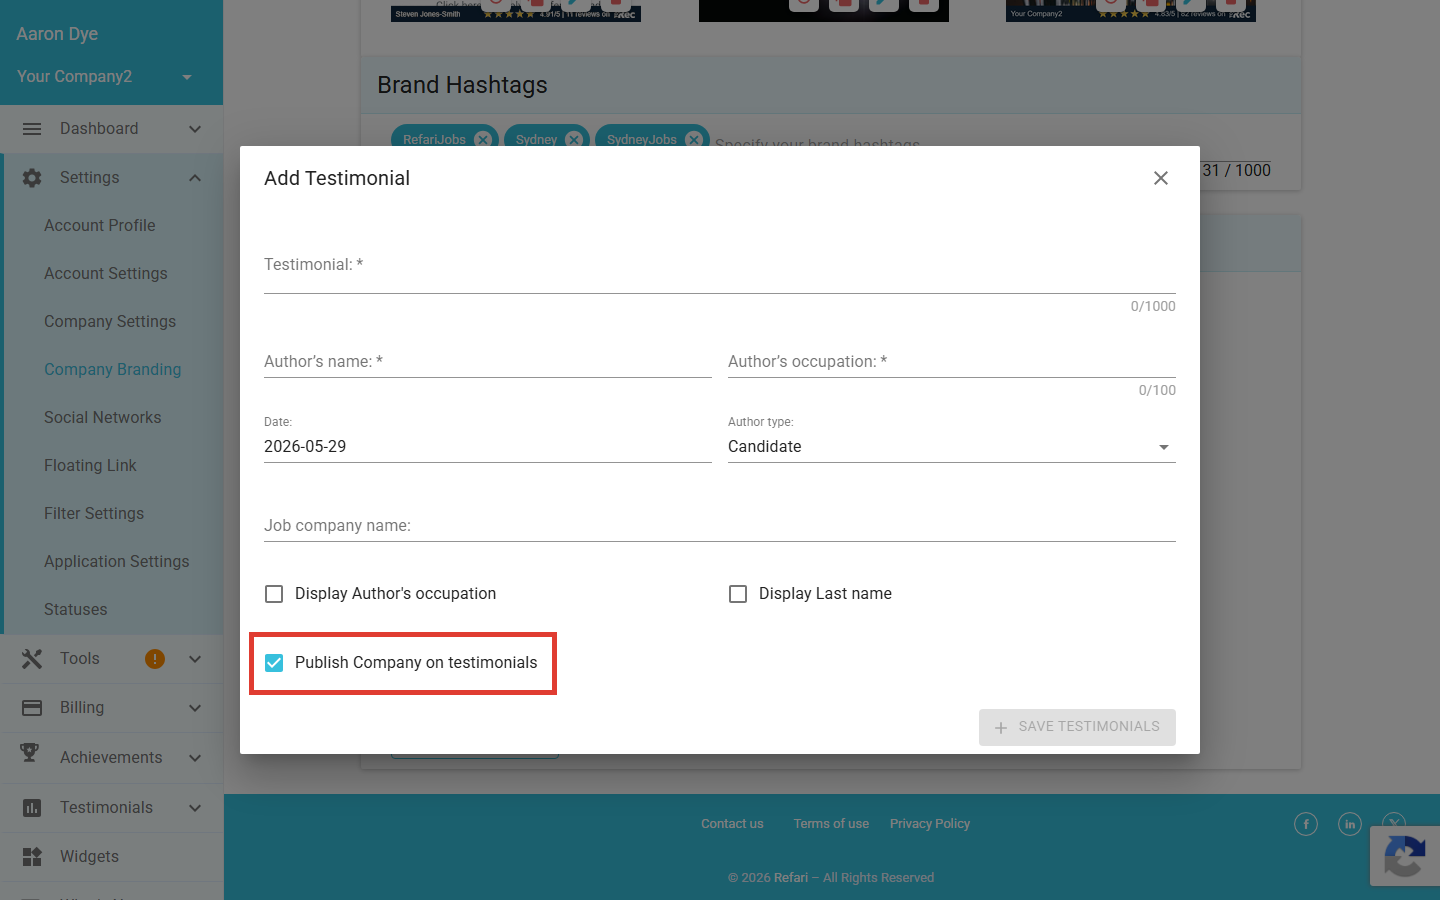
At the bottom of the modal there is a checkbox labelled Publish Company on testimonials. Tick this if you want the value you entered in the Job company name field above to appear publicly alongside the testimonial in any widget that shows it. Leave it unticked if you would rather show only the author's name and occupation.
Step 4: Save the testimonial
Click + SAVE TESTIMONIALS at the bottom right of the modal. The modal closes and the new testimonial appears in the Company Testimonials section, with an Edit testimonial link below it so you can adjust it later.
Final Notes
You can add as many company testimonials as you like. Use the Edit testimonial link under each entry to refresh wording, change the author details, or remove a testimonial that is no longer relevant. If you have not yet added a testimonial widget to your website, the related guides below cover where they go and how to install them.